Collar tie and inside tie / two figures
Ties / Solo mat / Build
The tie position shown with a second figure: one hand at the back of the neck, the other inside the upper arm, both athletes in a stance.
Illustration of position, not a partner technique to copy without a coach. Illustration of a position, not a partner technique to copy without a coach. The second figure is static and does not resist. Not coach-verified.
Why it matters
A tie is easy to describe and hard to picture: where exactly the hand sits, which way the elbow points, how close the hips are. A second figure makes the geometry visible from every camera. It shows the position; it does not show the fight for it, which is the whole skill.
The phases
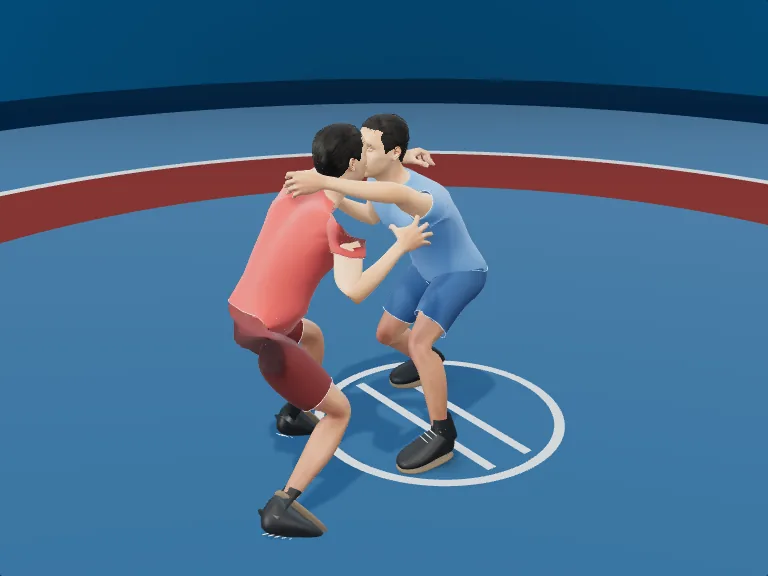
Collar tie and inside tie two figures
- Collar and inside. One hand cups the back of the neck; the other takes the inside of the upper arm.
- Elbow down. The collar-tie elbow stays down so the forearm rests on the collarbone, not on the head.
- Pull and post. The pull comes from the hips and feet; the inside hand posts and controls the arm.
- Reset the ties. Keep the stance under the ties. Losing the base to win a tie is a bad trade.
Watch for: The second figure is static. It does not fight the ties back, and a real tie is decided by that fight. Illustration of position only.
Three common faults
- Forearm on the head
- The collar-tie arm rests on the skull instead of the collarbone. Elbow down, forearm on the shoulder line.
- Outside hand
- The second hand lands on the outside of the arm and controls nothing. Inside the arm, palm to the bicep.
- Standing tall to reach
- The stance rises to get the hands there. The hands come to the position from the stance, not the other way.
In the room
- Turn it around: the collar-tie forearm rests on the collarbone, the elbow is down.
- The inside hand is inside the arm, not on top of it.
- Both figures keep a stance. Look at the hips, not the hands.
Drill prescription
| Rounds | Look, do not drill |
|---|---|
| Repetitions | Turn the camera through all four presets |
| Rest | None |
Illustration of position. Take the picture to practice; do not rehearse ties on a person from it.
Open the visual study ↗Where it sits
Situational: Partner mirror work, position illustrations with a second figure, and the review round.
Also in this stage: Sprawl on a shot / two figures, Partner mirror movement, Stance and movement review.